![[Previous]](prev.gif)
![[Next]](next.gif)
![[Contents]](toc.gif)
![[Index]](index.gif)
This appendix describes the following security options:
Client authorization lets you control which users can send data to your Netstation.
If you enable Client Authorize (on the X Server - Security configuration screen or in the remote configuration file), your Netstation can only be used by clients that produce the correct 128-bit magic cookie or key. This method of authorization is also referred to as MIT-MAGIC-COOKIE-1 authorization.
When you log in
via a display manager such as XDM, dtlogin, or vuelogin,
a random key is generated.
This key is written in your $HOME/.Xauthority file.
Any client that can read this file can send data to your Netstation.
Because you are usually the only user with access to this file,
client authorization generally prevents other users
from writing data to your display.
If you want to permit another user to send a window to your display, you need to give the user access to your .Xauthority file. Here is one way to give access for the current session:
chmod 644 .Xauthority
xauth merge receiver_home_dir/.Xauthority
.Xauthority file by typing:
chmod 0600 .Xauthority
Because each new session has a new magic cookie, you will need to repeat these instructions for each session that you want to share windows (or turn off client authorization).
The .Xauthority file is in a format that you cannot view or edit.
To modify this file, use the xauth utility.
(For more information, type man xauth.)
Additionally, when the Netstation boots up, it reads the file pointed to by the Xauthority File configuration parameter (Xauthority File). Any magic cookies in this file will allow a client to access the X server. This file is inherently a public file (readable by TFTP), so the use of this feature should be restricted to testing or public Netstations. General users should also be prevented from writing or creating these files. The format of this file is the same as the .Xauthority which is created in the user's home directory.
You can temporarily disable client authorization
with [Defeat Security] on the X Server - Security configuration screens.
When you enable [Defeat Security], all other local users will have
access to your Netstation until you reboot or disable this button. Please note
that when you select [Defeat Security], you disable both client authorization
and access control.
Access control lets you control which workstations can send data to your Netstation. Because many Netstations can use the same workstation, client authorization is usually more appropriate than access control. If you enable client authorization, access control is ignored.
If you enable Access Control (on the X Server - Security configuration screen or in the remote configuration file), your Netstation can be used by any client that is running on a workstation in the access control list. It can also be used by any client that has access to the appropriate key (described in Using Client Authorization).
The default access control list contains:
/opt/hpxt/enware2/xthome/etc/terminalname.hosts file).
See Xhosts File.
To give a new workstation access to your Netstation, add its
IP address or hostname to the
/opt/hpxt/enware2/xthome/etc/terminalname.hosts file.
To revoke a workstation's access, remove it from this file.
To give or revoke access for the current session only,
use xhost on the login server as follows:
xhost +host
xhost -host
where host is the hostname or IP address.
You can temporarily disable access control
with [Defeat Security] on the X Server - Security configuration screens.
When you enable [Defeat Security], all other local users will have
access to your Netstation until you reboot or disable this button. Please note
that when you select [Defeat Security], you disable both access control
and client authorization.
With the Remsh Access remote configuration parameter, you can specify which remote shell access (remsh or rsh) commands can be issued by a specific user on a specific workstation. This also determines which clients can be started.
For more information, see the following sections:
With the Remsh Access remote configuration parameter, you can set the following access levels:
x w r * rwx.
Remsh commands have the following syntax:
remsh terminalname command [parameters]
For Sun workstations, use rsh instead of remsh.
For example, if your Netstation has the terminal name hpxterm1, the command to list the processes running on your Netstation is:
remsh hpxterm1 ps
To start up the configuration screens from the command line, enter the
following:
remsh terminalname config
For a listing of all commands that get information from the Netstation, type:
remsh terminalname get help
remsh xterm1 get log
ps kill pid reset reboot putlog string reconfig ls /dev/device cat file get parameter get help for a list of available parameters.
adShow directives file loaded by the Netstation.
env ping hostname [Password] button on all configuration screens (if the
Configuration Password Allowed parameter in the remote configuration file is
set to true).
With the Configuration Screen Area(n) Access remote configuration parameter, you can specify which configuration screens a user can access. The "n" refers to one of the icons in the first column of the configuration screen, where:
There are three levels of configuration lock:
When configuration access is locked, remote configuration and DHCP/BOOTP are automatically enabled.
In order to restrict local access to configuration screens, you can enable password protection on the configuration screens. To do this, complete the following steps:
[F12] to access the configuration screens.
[Password] button on the configuration screen.
The [Password] button only appears when the remote configuration
parameter Configuration Password Allowed is set to True (the default value
is False). Change the value to True and reboot your Netstation to view the
[Password] button.
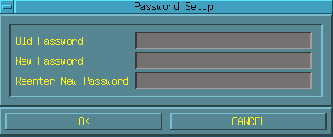
The following popup window appears:

Password Configuration Popup Window
[OK].
Your configuration screens are now locally protected.